

In this show tutorial, I will show you the basics of Structured Query Language, also known as SQL. We'll install together Database Management System as a part of the LAMP stack via XAMPP and I will explain how to use MySQL Command Line Interface in Terminal (or Command Prompt) to communicate directly with your databases without using any middleman interface like phpMyAdmin.
Do you prefer video?
What you'll learn
Once you're all set, we will inspect together the default MySQL databases that come with the XAMPP installation.
I will also teach you how to:
- create a new database,
- define a new table
- delete existing table
- insert new record
- update existing record
- retrieve table data
- removing table data
We will take a look at some special table features like primary keys and auto-incrementation.
Finally, we will build a simple table of action movies so you can truly understand how to use SQL language in some real-world scenarios.
I will make you a full-stack web developer in just 12 hours!
This tutorial is a part of a much larger and far more detailed online course available for free on Skillshare. If you're new to Skillshare, you'll get premium access not only to this course for free but to all of my other courses as well and for a good measure, to over 22.000 courses currently hosted on Skillshare.
You won't be charged anything for your first 2 months and you can cancel your membership whenever you want within that period. Consider it a 2 months worth of premium education for free. It's like Netflix, only for life-long learners :-)

Installing XAMPP
In order to work with the SQL-based database, you need to install DBMS (Database Management System), but there's an easier way as you can get it as a part of the development stack. Running DMBS is a matter of one click in such a case.
In this tutorial, we will use XAMPP which is available for both Mac and Windows platforms and it's very easy to install and use, unlike Docker or Vagrant, which are more complicated options.
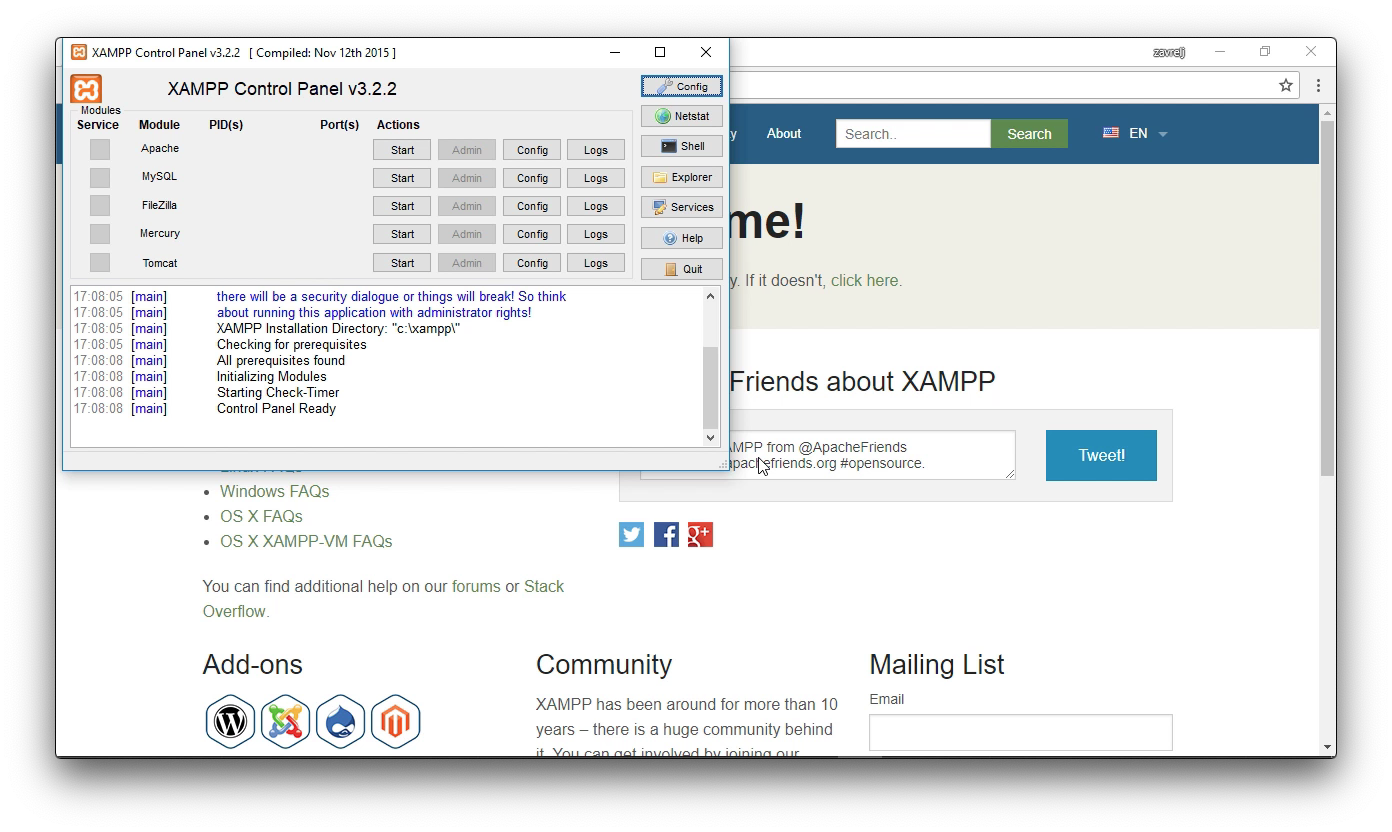
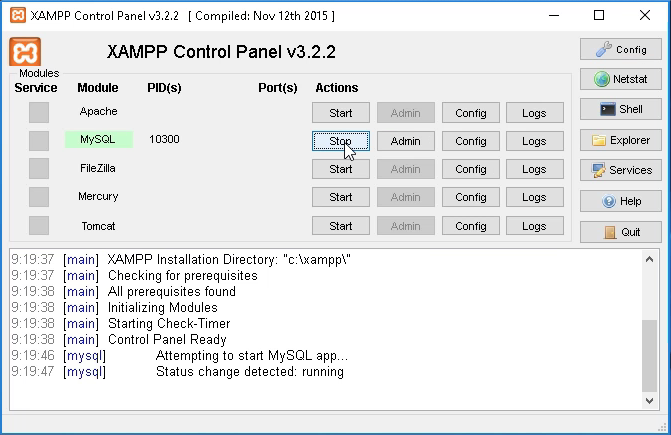
Go ahead and download the right installer for your operating system from https://www.apachefriends.org/download.html. The installation itself is pretty straightforward. Once you run XAMPP, you should be presented with a Control Panel which looks like this:
Terminal and MySQL CLI
You can't become a real developer without understanding the Terminal. It's like an invitation to a special club for professionals and it will make you see things differently.
These days, people rarely encounter Terminal because everything is hidden under the hood thanks to modern operating systems with GUI (Graphics User Interface).
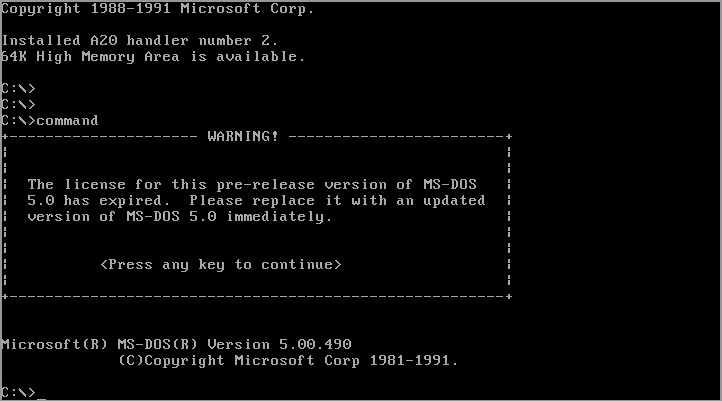
But some of you might probably remember MS-DOS, a command-line-based operating system from Microsoft.
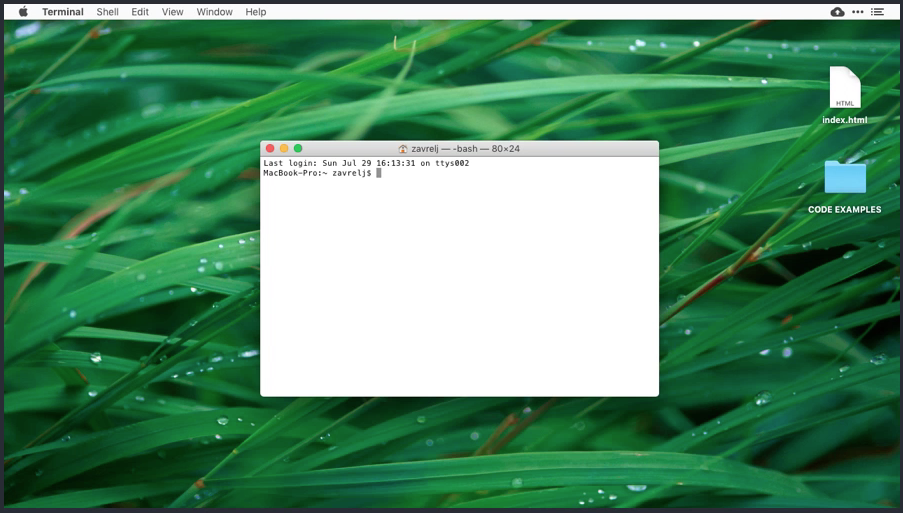
If you're on Mac, you'll find Terminal as an app from the Spotlight (CMD+SPACE). Once you'll hit Enter, you'll get this window:
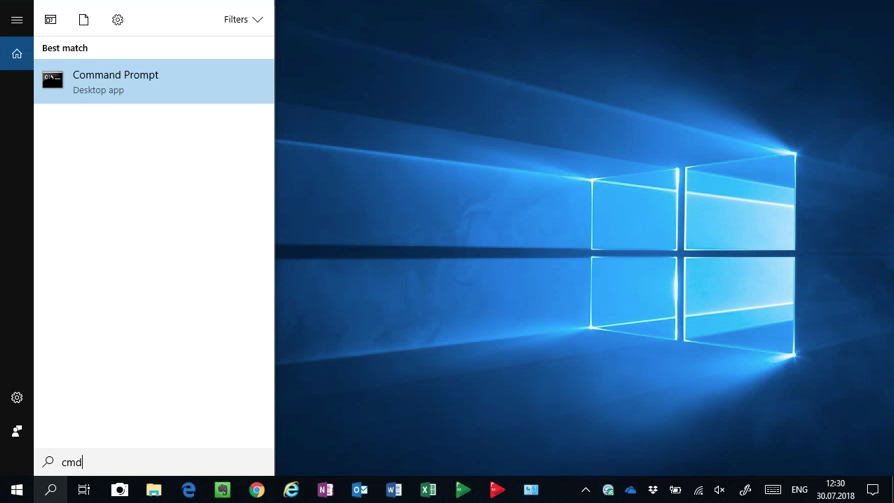
If you're on Windows, you can use Command Prompt by clicking the search icon next to the Start icon, type cmd and hit Enter:
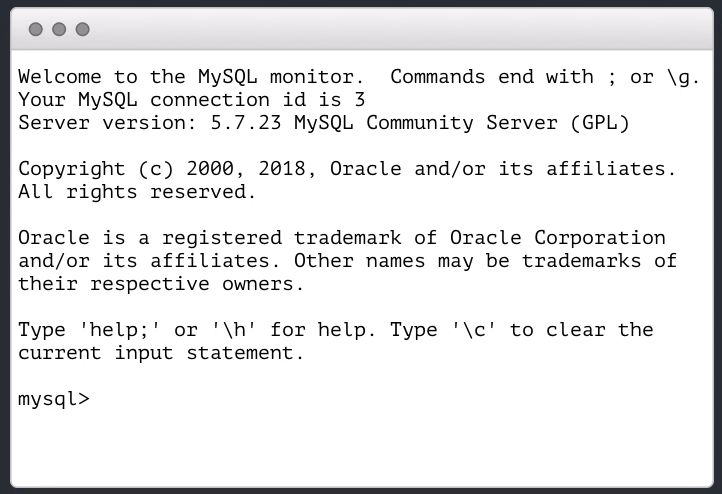
MySQL CLI is a Command Line Interface for managing MySQL databases. You'll use it inside the Terminal or Command Prompt and it will look similar to this:
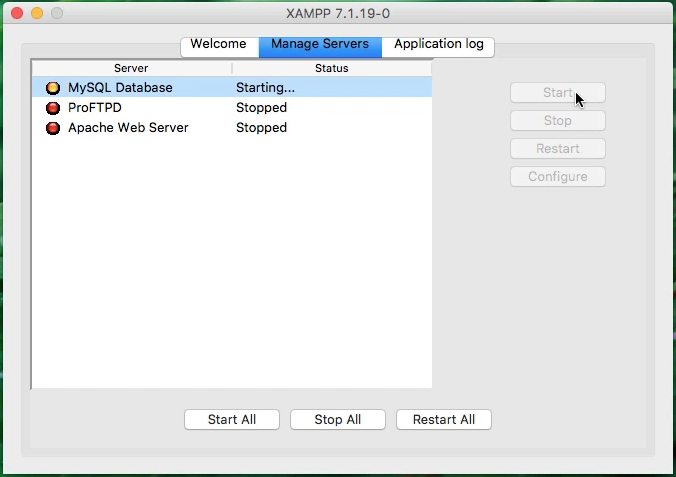
Let's take a look at how to use it with our XAMPP development environment. To access MySQL with XAMPP, we first need to start the service.
On both Mac and Windows, you need to go to XAMPP Control Center and start MySQL Database server:
Next, you need to navigate to the appropriate directory to use MySQL CLI.
On Mac, type these commands in Terminal:
cd /Appplications/XAMPP/xamppfiles/bin

./mysql -uroot
We don't need to type any password since the default configuration of XAMPP has no password set for the root user.
Don't worry if you see MariaDB instead of mysql at the prompt. They both work exactly the same way as far as we are concerned in this tutorial.
On Windows, type these commands in Command Prompt:
cd C:\xampp\mysql\bin

mysql.exe -uroot
Inspecting databases
Now that you know how to connect to MySQL let's start communicating with our database system.
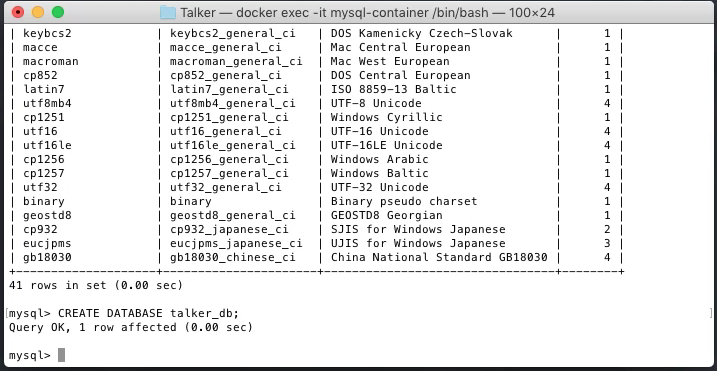
First, we will take a look at all databases available by default:
SHOW DATABASES;
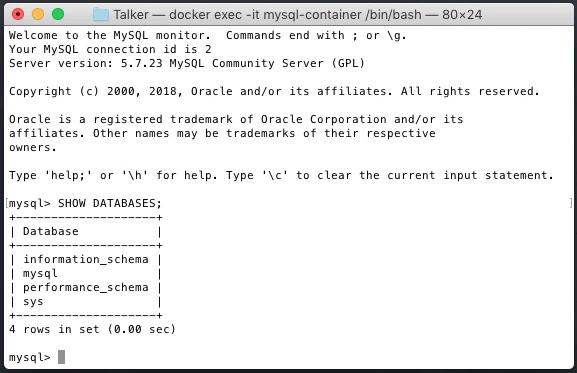
You should always see the information_schema database which stores information about all the other databases that our MySQL server maintains. It's also known as system catalog because you can find there everything about regular databases, like their names, access privileges, types and so on.
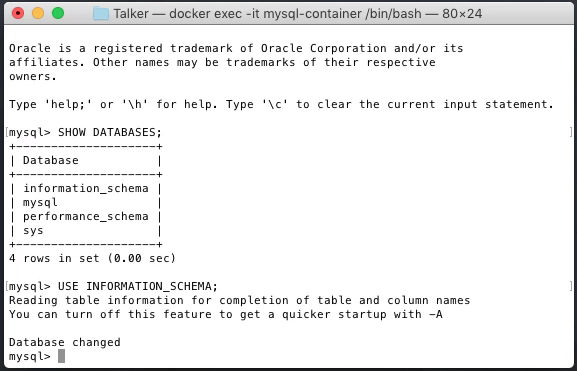
To work with a specific database, we need to select it first with the USE command:
USE INFORMATION_SCHEMA;
Now, we can inspect the database content:
SHOW TABLES;

Let's take a look at the structure of the CHARACTER_SETS table:
SHOW COLUMNS FROM CHARACTER_SETS;
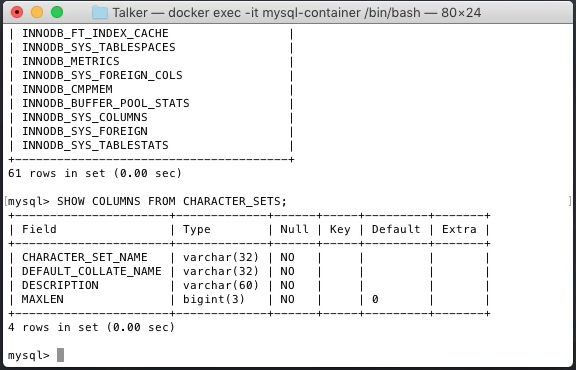
When you ask MySQL to show you the columns of the table, they will be listed in rows. This might be confusing at first, but it's actually quite logical. Lists are usually just a bunch of rows, and a list of columns is still the list, hence the rows.
Let's take a look at all records (list of rows) stored in this table:
SELECT * FROM CHARACTER_SETS;
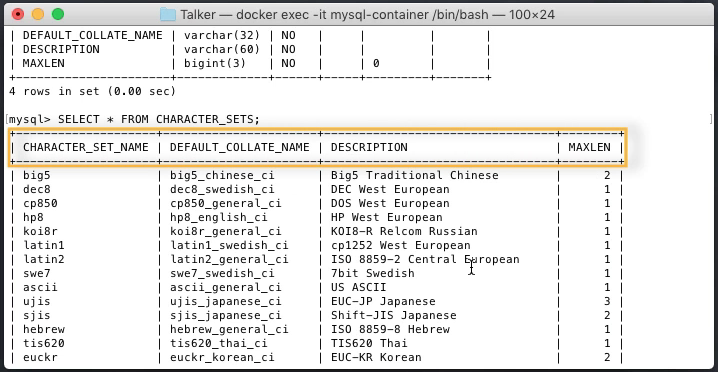
Here, you can see a bunch of rows (records) and four columns.
Creating a new database
Let's create a new database for our movies table:
CREATE DATABASE talker_db;
If you're adventurous, use your own name for this new database. I picked talker_db because that's the name of the database I'm using in Total Web Development Course where I teach total beginners how to create their own Facebook-like social platform with private messaging and groups. If you think you might be interested in such skills, check www.twdc.online for more information about the Total Web Development Course.
Ok, back to our database. Let's check that it was created:
SHOW DATABASES;
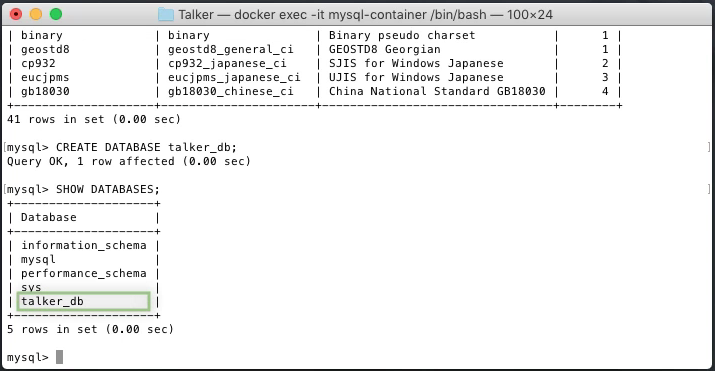
And sure enough! It appeared on the list.
When you create a database, it's always empty, but we will learn soon how to add some tables.
To delete the database, you'll use this formula:
DROP DATABASE talker_db;
But be very careful, because once you hit the Enter, there's no way to retrieve your data. It will be lost forever.
Creating a new table
We will create a movies table that will hold information about popular Holywood movies. For each movie, we will store its unique identifier, title, length in minutes, genre and main actor.
This is what we want to achieve:
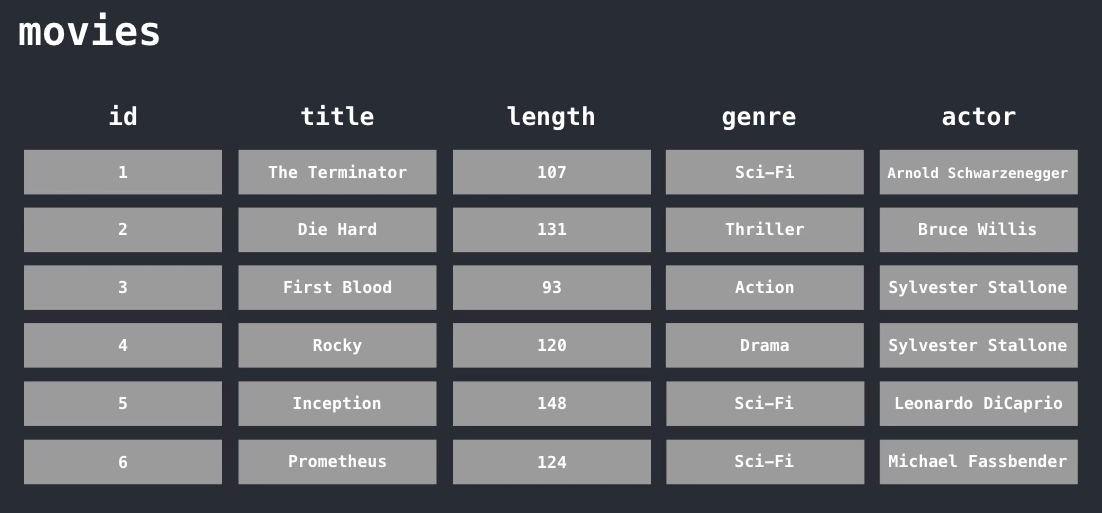
This means that we need to define five columns with appropriate data types.
When choosing the right data type for the column, it's important to consider the optimum storage size, because each data type reserves a certain amount of memory. It's a good practice to choose data type which can store all possible values and uses the least amount of memory.
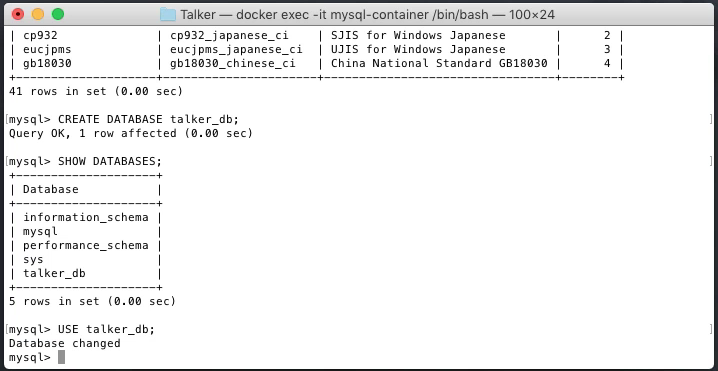
First, we need to switch to our talker_db database:
USE talker_db;
Next, we'll create a table by defining its name and columns:
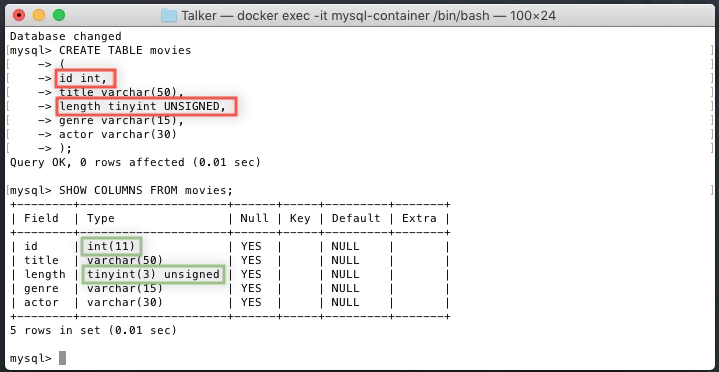
CREATE TABLE movies
(
id int,
title varchar(50),
length tinyint UNSIGNED,
genre varchar(15),
actor varchar(30)
);
It's a good practice to divide long and complicated formulas to individual lines with Enter. Remember that until you write semicolon, you can hit Enter and start typing on the new line. Once you write semicolon and hit Enter, the formula will be executed.
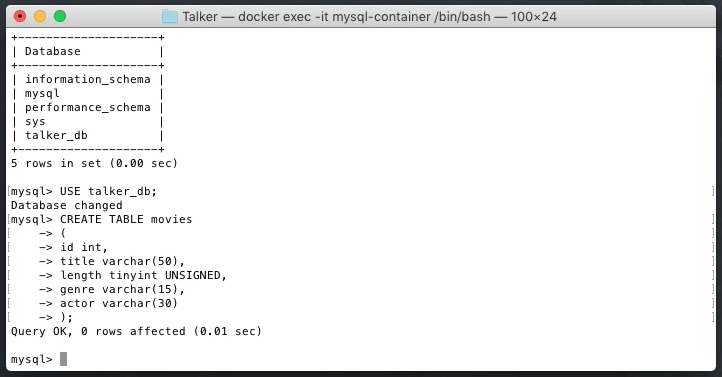
As you can see, MySQL will give you simple feedback: Query OK, 0 rows affected, and the time it took it to create the table.
If anything goes wrong or if you omit some column, you can always start again from scratch.
First, delete the table with this formula:
DROP TABLES movies;
Then, create it again.
Let's inspect the structure of the movies table now:
SHOW COLUMNS FROM movies;
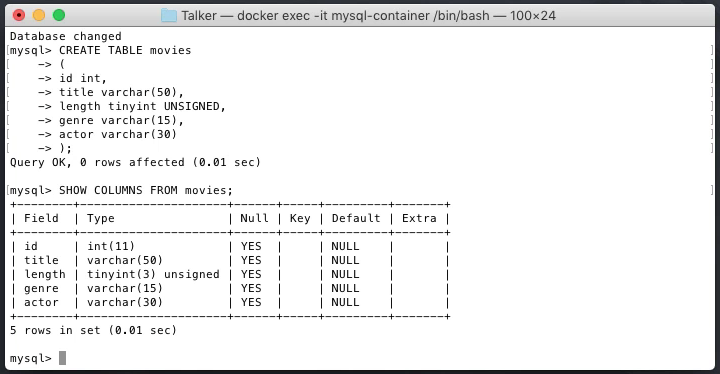
Everything looks good and you might have noticed that MySQL automatically added the maximum length for the int and tinyint data types where we didn't define them explicitly:
As you can see, there are other columns we didn't define at all, Null, Key, Default and Extra.
Null specifies whether the column can be empty.
Key specifies whether the column is indexed.
Default specifies the default value in case no value is explicitly specified when a new record is created. NULL means that the value must be always specified while creating a new record.
Extra specifies any additional information, like ordering, timestamp, and so on.
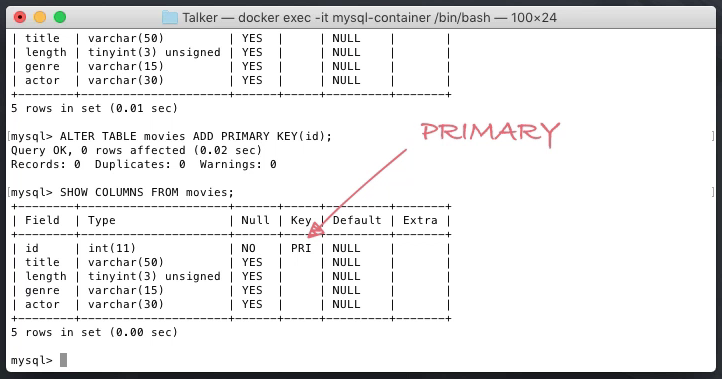
Let's add a primary key now by modifying the table:
ALTER TABLE movies ADD PRIMARY KEY(id);
And let's display the columns again to see the changes:
SHOW COLUMNS FROM movies;
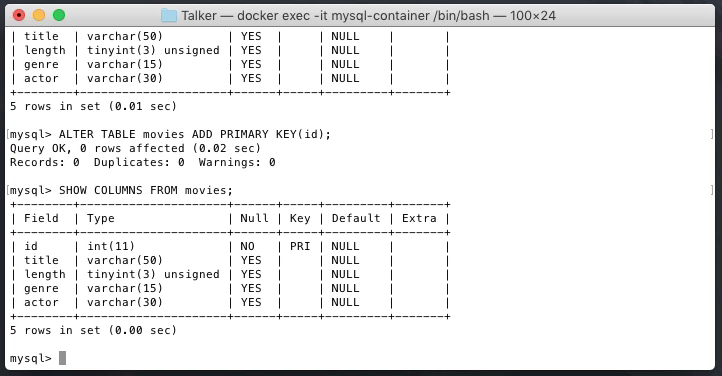
As you can see, the Null property is no longer YES for the id column, because the primary key can't be empty. And the KEY property has PRI value which stands for PRIMARY.
Let's add the automatic incrementation for the id column so we don't have to increment its value manually for each new record:
ALTER TABLE movies MODIFY id INT AUTO_INCREMENT;
And, let's check the results:
SHOW COLUMNS FROM movies;
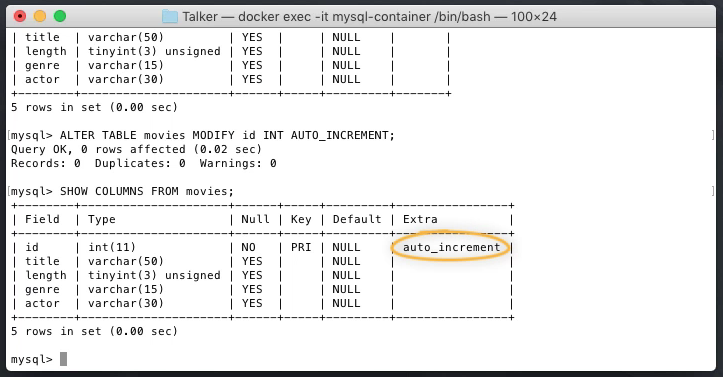
And sure enough, the auto_increment was added to the Extra property of the id column.
Inserting table data
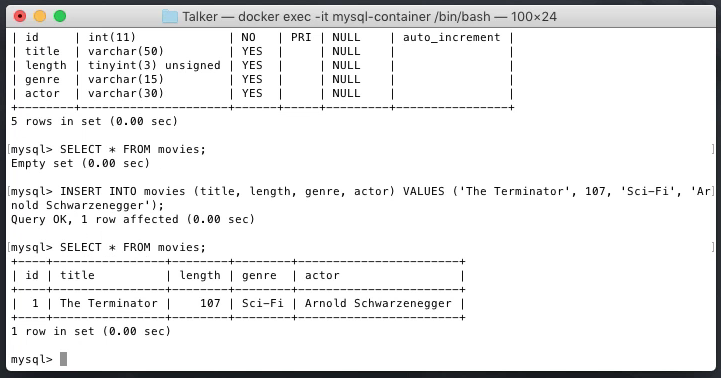
Our movies table is still empty as you can check with this formula:
SELECT * FROM movies;
Let's change that by adding some records:
INSERT INTO movies (title, length, genre, actor) VALUES ('The Terminator', 107, 'Sci-Fi', 'Arnold Schwarzenegger');
Make sure you always use single quotation marks when inserting string values. Double quotes can have different meaning based on SQL modes.
Also notice, that we didn't specify any value for the id column as it will be added and incremented automatically.
Let's check our first record:
SELECT * FROM movies;
Great! Let's add some more records:
INSERT INTO movies (title, length, genre, actor) VALUES ('Die Hard', 131, 'Thriller', 'Bruce Willis');
INSERT INTO movies (title, length, genre, actor) VALUES ('First Blood', 93, 'Action', 'Sylvester Stallone');
And let's check the content of the table now:
SELECT * FROM movies;
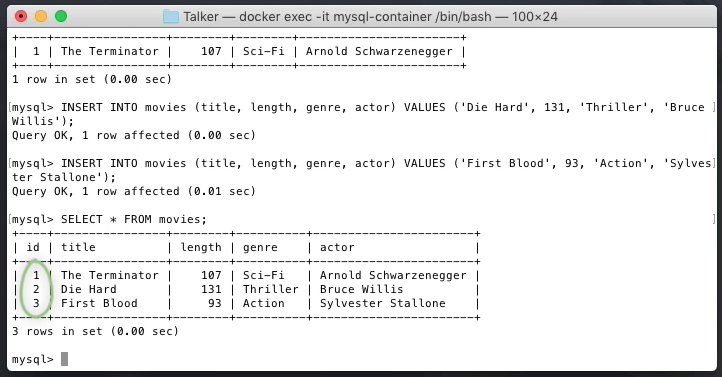
As you can see, MySQL is happily adding a new id every time you add a new record.
Want to learn more?
The rest of this tutorial is available for free on Skillshare as a part of the much larger and far more detailed video course. Again, if you're new to Skillshare, you'll also get premium access to more than 22.000 courses. Remember, that you won't be charged anything for your first 2 months and you can cancel your membership whenever you want within that period. Skillshare is Netflix for life-long learners.